Tuesday, September 29, 2009

Block of the Month Week

This week I've been working on a few BOM's.  Don't you just love a block of the month quilt?  Do one block a month and at the end of the year you've got a quilt.  Of course if you're like me and participate in a few BOM's, it's a bit more of a challenge.

This block is for my bee challenge.  This block will go to Linda.  She selected the paper pieced pattern and provided us with the black/white fabric.

Our guild is having two BOM's this year.  This one is the more advanced one.  I know!  This doesn't look like what I typically make!  I signed up so I could force myself to work on my piecing skills, which are indeed lacking.  I had some fabric from the same line on hand - I bought it years ago when I was more traditional.  I figured this would be a good use for it.  And yes, the quilt will be beautiful, even though I'm not a traditional person.  Each month, we will be doing a different block in the center with the same frame (the green and tan) around it.
This is our guild's other block of the month, meant for beginners.  I signed up for this one, too. Those who make this one turn them in at the next meeting and there's a drawing to win all the blocks.  I'm always glad to have a chance to win blocks - this would make a great donation quilt.
Prince is doing well.  We've got a new plan to battle the snakes.  I'll tell you about it soon.  We're at war with the venomous snakes!!!

Friday, September 25, 2009

Prince Improves and Calendar Girl

Can you tell he's feeling better?  He's still a bit woosy from all of the medications and sleeps all the time, but I got him to wake up for the picture.  I'm glad this week is almost over - I don't like these snakebite roller coasters!  Hubby took off early from work today; he's in the backyard as I write this, redoing the dog run.    
I meant to do this shout out to my friend, Ruth Ann, earlier in the week, before the snake took over my blog.  Better late than never, I guess.  Ruth Ann's fabulous cat quilt is featured on this week's page in the Quilting Art calendar.  Congrats, Ruth Ann!  She loves orange, and most of her quilts show it.  I'm an orange lover, too! 

Thursday, September 24, 2009

Snake Bite Blues


This photo says it all, I think.  This is what it feels like after getting bitten by a snake.  Absolutely pitiful.  We can see the two fang marks on his nose, though they can't be seen in the photo.  He's tending to let his tongue stick out - I'm sure the inside of his mouth still has swelling.

He was home with us last night.  I'm taking him back to the vet this morning.  If all is well, she will take out his catheter and release him.  Meanwhile he must take 5 different prescriptions.

Prince is very listless, but Mickey was the same way for days after he was bitten.  This time at least we know what to expect.  I promise to get back to quilting posts soon.

Wednesday, September 23, 2009

Prince Update

The patient is doing well today!  He's still swollen, but not nearly as badly as he was yesterday.  I took this pic this morning while transporting him from the overnight emergency clinic to the regular vet.  I think they will release him today!  I certainly hope so.  Mickey didn't sleep well last night without him, which meant hubby and I didn't sleep well either.

We've lived in the same house for the last 18 years, and we've had up to 5 dogs at a time since then.  We've never had a snake bitten dog until this year, when we've had 2!  We really think the excessive rain our area has seen this summer has brought the snakes out.  Enough already!

The anti-venin treatment is $700.  The vet said the reason it's so expensive is that not many people want to "milk" the snakes.  Sounds like a lucrative career, but for someone else.  I don't care to ever see a snake again.

Tuesday, September 22, 2009

Another Snakebite!

It has happened yet again!  If you been following my blog since July, then you know our little dachshund, Mickey, was bitten by a copperhead on July 14.  He came close to dying since the bite was so close to his heart.  But he survived and is just fine.

But, today our dear Prince, the 7 year old dachshund, was bitten.  We have a dog run in our yard to keep the dogs away from all the bushes where snakes could hide.  I came home this afternoon from getting a flu shot and found all three dogs on the wrong side of the fence.  The doxies had dug under the fence, and big Oliver apparently jumped over to join them.  Prince's face was swollen to triple its normal size.  I put Oliver and Mickey in the house and took off to the vet.

The vet said he's lucky (if you can call being snake bit lucky) that the snake got him on the nose, and not on his neck (could cause breathing problems) or closer to his heart.  They had a supply of anti-venin (no, I didn't spell it wrong - I've now learned that's what it's called).  They immediately gave him an injection of Benedryl and by the time hubby met me at the vet, the swelling had already gone down a good bit.  But he still looks pitiful - picture a dachshund with a droopy bloodhound head.

So we left him there to get an IV of the anti-venin.  We have to go back later tonight to transport him to the overnight Emergency Clinic.  Then we'll pick him up in the morning and take him back to the vet.

The good thing is that he can walk, which Mickey couldn't after his bite.  So we think he'll be okay.

Hubby has already redesigned our dog pen fencing (in his head) to keep the dogs from digging under.  Hopefully, this weekend we will redo the fence per his idea and we will not have this problem again.  I'm sure all the rain we've had lately has run the snakes from their nest, sending them into our yard.  When Mickey was bitten in July, it had rained for a few days prior.

So here we go again, but hopefully we will again have a happy ending.

Monday, September 21, 2009

The Finished T-Shirt Quilt Top

Ta DAH!  Here's the finished quilt top that I used in my tutorial.  Let me tell you, this is one BIG quilt.  I think it's the biggest t-shirt quilt I've ever made.  The graph paper plan worked well; everything came together like a puzzle.  This client wanted "denim-like" fabric, so I used a dark and a light version for the quilt's two fabrics.   On to the quilting!  Click on the picture to view it a bit closer.

Sunday, September 20, 2009

An Easy Baby Quilt

Look what I won at the quilt guild meeting last week.  The fat quarter for the month was anything with dots.  If you take a fat quarter, your name goes into the drawing for a set of fat quarters.  I've never taken the time in the past to find a fat quarter to match that month's requirements.  But I did last week.  And I came away with these beauties.

Our guild has a Cuddle Quilt program, as do many guilds.  Each member is asked to make one small quilt per year to be donated to a worthy charity.  I want to get my done early in the guild year.  So today I cut the dots up into 4 x 6 inch rectangles.  Four fat quarters gave me 48 rectangles, exactly the amount I needed.  Then I cut 48 4 x 4 inch white muslin squares.
Next it was time for lots of chain piecing.
Then I had stacks of blocks.
And then a finished quilt top!
I can't take any credit for the pattern.  One of our guild members gave us all a handout with the instructions for this little quilt, hoping to generate more cuddle quilts.  Her example was made from scraps for all the rectangles and was adorable!  But mine will certainly do.  My goal is to have it quilted and ready to turn in at the October meeting.

Thursday, September 17, 2009

Why I Love My HQ16

I quilted my first large project on my new machine today.  This is a t-shirt quilt so all it needed was a large meandering pattern.  But this machine accomplished the task so well.

I love the way the machine is out of my way. 

 I love the way the table fits perfectly into my little dormer nook.  I don't have to worry about the quilt sliding off the table, so no drag at all, even when working on a large project such as this.

I love the fact that the bobbin is so big.  I only had to change it once while I did this quilt.

I love the speed control on the machine.  I set it at a certain speed, then push my foot all the way down on the pedal.  This gives me consistent stitches.  For now I have the speed set fairly low, but as my skills improve I know I can speed things up.

I love the fact that (unlike with my domestic sewing machine) I didn't feel like I was in a wrestling match with the quilt.  The table is nice and big so it is able to support even a large quilt well.

Of course, I'm not planning to quilt everything in this meandering fashion.  I want to learn feathers and other cool patterns.  And I know with lots of practice, I'll get there.  I see lots of finished projects in my future.

Tuesday, September 15, 2009

Basting Away

Today has been a basting day.  This the the first of three t-shirts quilts I've been working on (not the one shown in the tutorial).  This will be the first large quilt I will machine quilt on my new machine.  Can't wait to get started!  Maybe tomorrow will be the day for that.

I made the little basket that holds my safety pins.  It's woven from dried pine needles from our yard, along with some raffia.  This craft held my interest for a few months several years ago.  And with all our pine trees, I didn't have to buy any supplies except the raffia.  A "green" craft if there ever was one!  On the negative side, the pine needles had to be washed in soapy water in the sink, and then soaked.  And I had to keep them damp (by wrapping them in a wet towel) while I worked.  A messy job.  I don't think my allergies would cooperate if I tried to make another one now.

I've also been sewing the blocks for the tutorial t-shirt quilt together with sashing between.  This is the easiest part of the entire process and has gone quickly.

Friday, September 11, 2009

How to Make a T-Shirt Quilt: Part 6

The interesting thing about this quilt is that the planning is the most time consuming part. Once that part is complete, the sewing is a breeze!

Now we need to cut several 2 1/2 inch strips from that first fabric, the same fabric we used to frame those few unique blocks in the last step.  I usually cut approximately 5 strips at a time. When those have been used, I cut a few more.

Sew a strip to each side of all the remaining t-shirt blocks, trimming the strip ends and pressing the seams AWAY from the t-shirt as you go.  

A word about pressing:  Be careful!  (Okay, so that was two words!)  As we have all probably learned the hard way, some t-shirt emblems will melt and smear across the shirt when under a hot iron.  So avoid placing the iron on the emblem.  You can always press from the back side when needed.

Repeat the "framing" process, until all the blocks have been "framed."
Now for the final step!  Cut 2 1/2 strips from the second fabric.  Using the graph paper pattern as a guide, sew the framed blocks together using these new strips as a sashing.  Study the pattern as you go to figure out the best order in which to sew blocks together.  Typically, it works best to connect a few blocks together and then set them aside to work on another small section of the quilt.  Occasionally I use partial seams to connect the sections.

Once the quilt top is completely sewn, sew a 2 1/2 inch border of the sashing fabric around the entire quilt.  If desired, add additional borders.

Quilt.

Bind.

Enjoy!

p.s.  I'll post a photo of the finished quilt in the near future.  Thanks for sticking with me through my first tutorial!

How to Make a T-Shirt Quilt: Part 5

For this particular quilt, I ended up with three t-shirt blocks that didn't have enough fabric surrounding the emblem to cut them any larger than I'd already planned.  I marked each of these on my graph paper pattern with a nice big X.  Then I drew around each one to make it the size I really want.

The next step is to build out this block with fabric.  First, use a rotary cutter and ruler to trim the t-shirt block.  The example above is listed as 6 by 6; we need to add seam allowances before trimming, so we'll cut it at 6.5 by 6.5 inches.  By looking at our graph paper plan, you can see that we have different widths of fabric needed on the sides of the block.  On the right side of the block, there is a width of 3 graph paper squares (or 6 inches) to fill.  On the top and left sides there are two squares of width (or 4 inches) to fill, and on the bottom we only need 2 inches.

Now we (finally!) get to work with fabric.  Remember we are using two different fabrics for this project.  Select one of the fabrics to frame the blocks.  The widest width I'll need for this block is 6 1/2 inches (6 inches on the right side of the block plus seam allowances).  I cut one strip at this width.  Then I cut a 13 inch piece from this strip and put it aside for the right side.

I cut the remainder of this strip down to 4 1/2 inches (for the top and left side of the block).  Then I cut one more strip from the fabric at 2 1/2 inches wide.  I sew part of this strip to the bottom of the block.

I sew 4 1/2 inch strips to the left side and top side.
And lastly, I sew the 6 1/2 inch strip to the right side of the block.
I know what you're thinking- "But the t-shirt emblem isn't centered in the block!"  My answer is, "So what?"  I think the imbalance add some interest, the same way turning some blocks sideways adds interest.  Of course, if it would make you feel better, you can cut your strips of fabric so that the emblem is centered.  It's your quilt, after all!

Repeat this technique with any other blocks as needed.

Now, one more thing to do for this step.  Trim the rest of your t-shirt blocks according to the measurements recorded on the list, always adding 1/2 inch to each measurement for seam allowances.  We're getting close to the end!

How to Make a T-Shirt Quilt: Part 4

Now we're going to adjust the size of some of the t-shirt blocks so they will fit into our graph paper plan.  Let's use block Number 14 in my quilt for our example.  It's in the lower right corner of the plan below.  You may need to click on the photo to get a clear look.

Do you see that the gap above block 14 is three squares wide instead of only 1?  Let's see if we can fix that.
I pull that block and grab my ruler.  Since the space is two squares bigger than we need, I'd like to increase the size of this block by 4 inches, finished.  (Remember, when we did our initial measurements, we wrote down the MINIMUM size - now you know why!)   I check the block to see if I have enough room to make it 4 inches bigger on that side, plus 1/2 inch for seam allowance.  Woo Hoo!  It will work!
Now I make sure I mark the correction on my handy list - see how I changed the 10 to a 14?  Remember, this list indicates FINISHED sizes of blocks (no seam allowances).
I also mark the change on my graph paper plan, extending the size accordingly.  Repeat this step on as many blocks as necessary, aiming for a one square space (2 inches) between all blocks.

Sometimes you will find that there is not enough extra fabric around an emblem to cut it bigger.  What to do?  Stay tuned!

Thursday, September 10, 2009

How to Make a T-Shirt Quilt: Part 3

Got your graph paper and pencil?  Let's get started!

It doesn't matter what size/scale graph paper you use.  The kind I happen to have has four squares per inch.  I always make one square equal two inches.  This works well since all our measurements are even numbers.

Using the list of t-shirts and measurements, draw the first t-shirt block on the graph paper.  Add a two inch border (one square) around the block.  Write the number of the t-shirt on the drawing and underline it.  Underlining the number will help us to remember how to orient this block later.  Since we always wrote the horizontal measurement first, it's easy to tell how to draw this in the correct orientation.

In this example, the Number 1 block is 16 by 6.  As you can see, I drew it 8 squares across by 3 down, since each square equals 2 inches.  Then I added the 2 inch (or one square border around it.

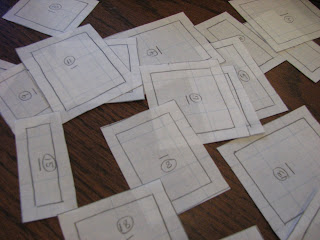
Continue to draw all the t-shirt blocks in the same manner.  These will be cut out, so you don't have to leave any space between them.
Now cut out all the blocks.  
Now we need more graph paper.  This particular quilt is going to have 20 blocks, some of them fairly large.  In other words, it's going to be a big quilt!  So I taped two pieces of graph paper together to plan the layout.  For a lap sized quilt, one piece of graph paper is usually enough.

At this point we need to decide how big we want the quilt to be.  Do you want to make a twin, full, queen?  Or do you even care?  Maybe you just want to make sure all the blocks are included and don't need to fit it to a bed size.

If you do have a particular size in mind, draw an outline on the graph paper to indicate the finished size, counting out one square for every two inches.  I haven't done this in this example since I don't care to make this quilt a particular size - I just need to fit all the blocks.

Begin positioning the cut out blocks on the graph paper, leaving one square's width border between the blocks.
Take your time.  This will involve lots of rearranging and starting over.  The goal here is to place all the blocks with a one block border between them, and end up with straight outside edges.  Sometimes you will need to have a larger space between blocks to make it fit.  I orient most of the block right side up, though I never hesitate to turn a block sideways to fit in a particular spot.  Having some of the blocks turn different ways give the finished quilt a bit of whimsy and fun.
Here is my finished plan.  Note that the perimeter of the quilt is straight, except for the upper right block which indents a bit.  For the most part, the space between the blocks is one square wide, though in a few spots I had to have a larger space (see lower right).  At this point, I secure each block with a small piece of rolled tape.  You could also use a glue stick.  Remember you can click on these pictures to enlarge them.

The next step will be to adjust some block sizes to make sure the spacing between the blocks is equal throughout.  Stay tuned!

Wednesday, September 9, 2009

How to Make a T-Shirt Quilt: Part 2

Now that all the t-shirts are trimmed and fused to a stabilizer, it's time to measure each one.  First measure the width of an emblem horizontally.  The goal here is to get the minimum FINISHED measure that this block can be, and then round it up to the nearest EVEN number.

For example, if the emblem is 13.25 inches wide, round up to 14.  If the emblem is 12.5 inches long, round up to 14.  We always want an even number.  Note that this is a finished size.  We'll worry about seam allowances later.  Also, we're only measuring now!  It's not time for the final cutting yet! 
Then measure in the same way vertically, again rounding up to the nearest EVEN number.
Next, assign the shirt a number and record a brief description of the emblem.  In this example this is the NUMBER 1 block, and I've recorded it as "Off to Work."  Now record the measurements you took, ALWAYS putting the horizontal measurement first.  In this example, the minimum finished size of this block is 16" across (horizontally) by 6" tall (vertically).
Measure all the t-shirt blocks in the same manner, recording the results.  Can you see that I have no ODD numbers?  This will be very helpful later.
In Part 3, we'll determine the layout of the blocks.  Grab some graph paper and a pencil for this step, and stay tuned!

Tuesday, September 8, 2009

How to Make a T-Shirt Quilt: Part 1

Here we go!  I know there are lots of ways to make t-shirt quilts, all of them good.  But this is the way I do it.  The key to my method is lots of planning before sewing.  You'll hear more about the planning in Part 2.

Of course, the first thing we need is lots of t-shirts.  I typically use from 12 to 20 t-shirts in a quilt.  Remember, some t-shirts have an emblem which fills the entire front of the shirt.  But some shirts only have a small emblem near the shoulder.  These shirts will all work together great, so don't discard a shirt just because its motif is small!

We will also need fabric.  I typically select two fabrics for the quilt top.  I buy 2 1/2 yards of each of these fabrics, though if you add borders with this fabric or use the same fabric for the quilt back, you'll need more.

As for fabric selection - if these are high school or college shirts, some people like to use their school colors.  Graphic black and white prints are also a good option.  Or just two fabrics that work well together.  Most t-shirt collections have a wide variety of colors - too many to match.  So just pick two fabrics which work well together (with some contrast between them) and the t-shirts will all come together nicely.

The next supply we need is a fusible stabilizer.  Since t-shirt fabric is stretchy, we must fuse a stabilizer to the back of each piece.  There are many great products out there for this purpose, but my favorite is Pellon Fusible Interfacing.

I buy it in packets that contain 3 yards of 15 inch wide interfacing.  I bought it on sale at my local Hancock's Fabric.  It happened to be on sale for only 77 cents per pack!  It's regular price was less than a dollar.

Not only is this product inexpensive, but I love that I can fuse it with only a steam iron.  Many similar products require a wet pressing cloth.

Now it's time to cut the shirts - don't be scared!  I use scissors to cut out the motif.  I cut VERY LIBERALLY around the emblem, including tons of space around.  
This is a rough cut, not meant to be perfectly straight; but don't chop out in a circle or other weirdo shape.  You should end up with a rough rectangle or square.
Now it's time to fuse!  Lay the rough cut shirt piece face down on an ironing surface.  Cut a piece of fusible to fit within the back side of the shirt, coming close to the edges but not overlapping the edges.  Make sure the fusible interface is positioned with the glue side down.  The glue side feels a bit rougher that the other side.
Using a hot iron with steam, press the fusible interfacing to the back of the shirt.  Repeat for each t-shirt piece.  Stay tuned for Part 2!

Saturday, September 5, 2009

A Great Fit!

Have you ever seen a machine fit better in a space?  My studio has four dormer windows, which usually are quite a pain.  One has a built-in desk, where my felting machine now lives.  Two have built-in window seats/storage where batting scraps and fabric scraps live.  The fourth now has a purpose.  Not only does the machine fit perfectly in the space, but the three walls will serve to keep a quilt from sliding off the sides and creating drag.  Couldn't be better!

I've spent some time today playing with my new toy.  At first I had a bit of trouble adjusting the tension: 
But I've now got it almost perfect:
The owner of the shop where I bought it is coming to my house next week to make sure I'm off to a good start.  

My back is feeling a good bit better - not 100%, but almost.  I guess I have no more excuses to keep me from fixing that upside down block in the second t-shirt quilt.

Friday, September 4, 2009

Down in the Back

I've spent most of the day either sitting against or lying on a heating pad.  I do think I'm a bit better though.  I opened the main sewing machine box and dug out the set up dvd and the instruction manual.  Hubby and I will set it up tonight.  Can't wait!

I haven't forgotten the tutorial for making t-shirt quilts.  I'll probably be doing it next week while I make the third one, so stay tuned.  Hopefully I'll be back at full speed by then.

Thursday, September 3, 2009

Square Dance

Today I had a quilt bee meeting - lots of fun as always.  I took my scrap challenge block in the above photo.  This is Lisa's block - 81  two inch squares.  I really struggled with this one.  Have I said I'm not a good piecer?  After 3 failed attempts at this block, I finally pulled out the gridded fusible, normally used in watercolor quilts.  Success!  I can't wait to see what Lisa does with these blocks!

When I drove up to my house after the meeting, look what was on my front porch!
My new HQ Sit-Down Quilting Machine!  In four boxes!  So excited!

The bad news is that I pulled my back out of whack early this morning.  I was lifting a heavy box (bad idea).  As the bee meeting went on, the pain increased.  Jeanette, our hostess, could see I was hurting, and gave me a stick-on heat patch, which I stuck on immediately.  I'm sure I'll be fine in a couple of days.  I'm taking a break from quilting for the rest of the day.  And hubby and I will probably wait until the weekend to lug the new machine up to my studio and set it up.  It will take both of us.  Until then, I keep lovingly staring at the boxes.

Wednesday, September 2, 2009

A Productive Day

Sorry, no photos today.  I never did find the batteries, so I ran to the store (not literally!) and bought more.  I even took a few pictures.  Then I saw where Susan's husband, Vann, died this morning.  I just couldn't bring myself to post a bright, cheery photo today.  I send prayers to Susan and their family.

I finished the second t-shirt quilt top today.  Then I hung it on my design wall and admired it. But there was one block I was not happy with.  I left it alone for a couple of hours (while I bought batteries and ate lunch).  I still was not happy.  So I unsewed a large block from the center of the quilt, ripped off the sashing from that section, resewed the sashing a different way, and sewed the entire section back into the center of the quilt.  It's not easy to sew a square piece into the center of a quilt.  But I did it!  Then I pressed the top again and hung it (again) on the design wall to admire it.

Guess what?  I had sewed the piece in upside down!  Oh my!  I'm losing my mind, I think.  After all that, I was tired of fooling with it, so I gave up for the day.  I'll fix it tomorrow.

Tuesday, September 1, 2009

Cranking Out Quilts

One t-shirt quilt top done.  One more almost done.  Hopefully by the end of the day Wednesday, there will be a third almost done.

I'm surprised I didn't see smoke coming from my sewing machine today!  It didn't let me down, just kept humming along.  It has asked me for a new needle before it starts its day tomorrow.  I will definitely oblige.

Anyway, so I grabbed my camera this afternoon to take some blog shots.  Batteries dead.  I cleaned out the closet where we keep our spare batteries yesterday.  I decided they need to be stored somewhere else.  But now I can't remember where I put them.  Typical.  If they don't turn up tomorrow, I'll take a break from sewing to go buy some.

Meanwhile, the kind folks at Handi Quilter called me yesterday.  My machine will be shipped by Wednesday.  Yay!  

I promise lots of photos tomorrow!