So you want to make a portrait quilt? I'm presenting here a mini-tutorial in case you want to participate in the SAY CHEESE self portrait challenge here and have no idea how to get started. For more details on this technique, see my book, Fabric Photo Play, AQS, 2005.
 First start with a digital photograph. I took this one of myself. Please excuse my hair, I let it dry naturally today into a frizzy mess. I'm planning to give myself a new hair-do in this portrait, so it doesn't really matter.
Load the photo into your computer and use Adobe Photoshop, or another photo editing software package to manipulate it. I really LOVE to use the Filter called Cutout. It divides the photo by value:
 I didn't think the above pattern had enough shadow on my face so I told the computer to add more values:
 Much better! Now I could simple trace each area and use the tracing to cut out various fabrics (of various values) to fuse onto a background piece of fabric. As long as I use light fabrics for the light values of the picture and dark values of fabric for the dark areas of the photo, then the portrait will turn out successfully.
Another option is to use the Sketch filter. I know this doesn't show up well, but maybe you can see it.
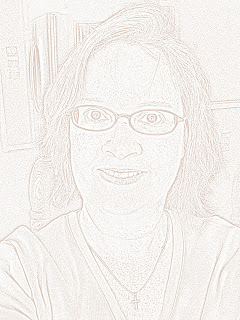

I've decided that for this self portrait I'm going to use this Sketch pattern. Today I transferred the pattern onto fabric. Tomorrow I'll get started adding life to it.


2 comments:
Thank you for this. Do you stitch the pieces on or just fuse them and then let any quilting do the rest?
At present, I only have Picasa. Are any of these (perhaps by a different name) in Picasa or does it have to be something a little closer to Photoshop to do this type of thing?
Thanks so much!!
Post a Comment